The Last Story quest is part of a collaboration event with Mistwalker's Wii game, The Last Story. The quest may be accessed from [Arena] > Special Quests.
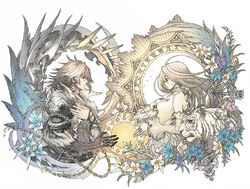
The quest features characters, settings, and music from The Last Story. The story from the quest picks up after the ending of the original game. It has a branching storyline, as well as five different endings. Branches and endings are influenced by actions taken by the player during battles.
Possible rewards from the quest include The Last Story characters Zael and Calista as S Class Adventurers. The re-release of the quest added Celestial Envoy as an SS Class Companion.
The full text from the quest's story can be found here: The Last Story/Story
Quest[]
- The Last Story
| Stamina Cost: 40 Difficulty: 65 Battles: 10 |
Branches[]
There are five different endings to the quest. The possible branches for each battle that leads to different endings is summarized below. In battles 1-9, branch A will lead to endings that give rewards, while branch B leads to Contrary Fate. Note that after reaching battle 5B, it's not possible to go back to branch A.
- Battle 2A
- Syrenne will not flee before battle starts.
- Next battle:
- 3A if Syrenne is kept alive
- 3B otherwise
- Battle 2B
- Syrenne will flee before battle starts.
- Next battle: 3B
- Battle 3A
- Has Shadow Lion x2, Shadow Panther x3
- Next battle: 4A
- Battle 3B
- Has Shadow Lion x3, Shadow Panther x4
- Next battle: 4B
- Battle 4A
- Next battle:
- 5A if battle ends within 5 turns
- 5B otherwise
- Next battle:
- Battle 4B
- Next battle:
- 5A if battle ends within 3 turns
- 5B otherwise
- Next battle:
- Battle 5A
- Next battle: 6A
- Battle 5B
- Next battle: 6B
- Battle 6B
- Has 3 Golems
- Next battle: 7B
- Battle 7A
- Next battle: 8A
- Battle 7B
- Next battle: 8B
- Battle 8A
- Ally Lowell will show up.
- Next battle:
- 9A if battle does not end before the 6th turn.
- 9B otherwise
- Battle 8B
- Ally Lowell will not show up.
- Next battle: 9B
- Battle 9B
- Mitra will not show up.
- Next battle: 10C
- Battle 10A
- Possible endings:
- If Zael hits Sentinel Beast Calista on the final turn:
- Perfect Fate if total drag time of all battles is less than 50 seconds
- Alternate Fate otherwise
- Blind Fate otherwise
- If Zael hits Sentinel Beast Calista on the final turn:
- Possible endings:
- Battle 10B
- Possible endings:
- Visionary Fate if Zael (job 3) and Calista (job 3) pincers in a specific way and kills Sentinel Beast Calista within 8 turns.
- Blind Fate otherwise
- Possible endings:
- Battle 10C
- Ending: Contrary Fate
Enemies[]
- Battle 1
- Zael
 LV72 (Ally)
 - Calista LV70 (Boss)
- Energy Spark LV65 x3
- Zael
- Battle 2A/2B
- Battle 3A
- Shadow Lion LV67 x2
- Shadow Panther LV64 x3
- Battle 3B
- Shadow Lion LV67 x3
- Shadow Panther LV64 x4
- Battle 4A/4B
- Mirania LV68 (Ally)
- Venomous Ghoul LV71
- Gryphon LV66 x2
- Mirania
- Battle 5A/5B
- Gurak Grunt LV68 x8
- Hermit Crab LV62 x2
- Gurak Grunt
- Battle 7A/7B
- Ogre LV67 x4
- Ogre
- Battle 9A
- Mitra LV78 (Boss)
- Zael LV74 (Boss)
- Energy Spark LV65 x2
- Mitra
- Battle 9B
- Zael LV74 (Boss)
- Energy Spark LV65 x2
- Zael
- Battle 10A/10B/10C
- Zael (Ally)
- Sentinel Beast Calista LV79 (Boss)
- Energy Spark LV62 x6
- Zael
Battle layouts[]
")
")
")
")
")
")
")
")
")
")
Note: Only branch A of battles 1-9 are shown. The (undesirable) branch B version of those may be slightly different.
Rewards[]
These are the possible rewards depending on the ending:
- Alternate Fate:
- Calista (100%)
- Perfect Fate:
- Visionary Fate:
- Celestial Envoy (100%)
The Blind Fate and Contrary Fate endings do not give any rewards. Detailed requirements of the other endings are given in the sections below. Additional recruitments of Zael and Calista will grant them a +3% skill boost.
Strategy[]
Swords are recommended, as most enemies will be Staves or Bows. Spears will take double damage on many floors, while Bows will have a weakness on only one floor. Magic (including elemental weapons) will not deal as much damage as swords. A healer should also be in the party, as it is a long dungeon. Elemental damage is needed for floor 9 if you are attempting to get Perfect/Alternate Fate endings.
Damage
- Self-buffers:
- Augment Circle users, when used with teammates of the appropriate weapon
- Other strong swords
- Decent swords
- Other strong physical damage
Elemental
Support
Not recommended
- Any additional mages and elemental weapon users outside the single unit needed for floor 9.
Perfect Fate[]
Up to two secret characters can be recruited by fulfilling a series of conditions.
- Spoilers: This section contains spoilers for the secret rewards of the quest.
To recruit both Zael and Calista : (Guide by Threestarz, see comments below to thank him)
Overall condition[]
Finish the whole dungeon (all 10 floors combined) with total CONTROL TIME (time spent dragging your units in your turn) of 50 seconds or less. As a marker, one full, non-extended control time bar is 4 seconds. If you only swipe near and fast, it can take as low as 0.4 seconds from my experience in looking at the time counter in puppet show. (I never had anything lower than 0.4 seconds no matter how near the distance or how fast I swipe. Might be the limit of the game.) So move fast whenever possible, as if you are playing the Puppet Show zone, and prefer small pincers with quick, straight movements over large pincers with more complex movements.
If you fail this condition but still do the dungeon according to the requirements below, you will get only Calista.
Team-building[]
There should be at least two very strong physical units, such as Bahl, Ma'curi, S'naip, and Suoh. A Circle manipulator (Ka'pori, Manmer, Djugan) can use Augment Circle to make all units of the same weapon very strong.
There should be at least one unit with Magical damage, to pass the condition on floor 9. Prefer units with many Magical attacks, rather than a few strong attacks. Ba'gunar, which every player receives in the story, has four elemental attacks, one which can be activated in chain and thus hit multiple times a turn. Leviathan and Bahamut, two Arena recruits, have up to five spells each when fully trained.
Control Time is mostly unnecessary, and relying on it will make it difficult, to say the least, to achieve the movement time condition. You can bring one just in case, but rethink your strategy so that it isn't necessary.
Basic team composition:
*If you can kill Calista on Floor1 in 1 turn with a pincer consist of just 4 units, it's a good indicator that you have a strong enough physical DPS team to get Perfect Fate.
- Physical attacker
- Physical attacker
- Physical attacker
- Physical attacker or second magical attacker
- Magical attacker
- Healer. Heal All highly recommended, as some enemies can hit every ally at once.
Floor 1[]
- Guest: Zael
- Victory: Defeat Calista.
- Condition (recommended): Do not let Zael hit Calista with an attack.
- Zael cannot pincer Calista directly, nor hit her with his skills (vertical and horizontal slashes, activated on chain). If he does, Calista will say "!!".
- Zael can be chained without failing the condition.
- A player's Zael will not count for the condition.
- Success text (page 14): "Guess they won't just accept an apology at this point."
- Failure text (page 14): "It's hopeless, there are too many of them."
- Time: Finish this floor quickly, or you can be overwhelmed.
If Calista was hit by any of Zael's attacks or pincered by Zael, it is still possible to get Perfect Fate, but the Floor 4 condition will be more strict.
It is best to finish Calista in one or two turns. Make a fast vertical pincer and don't worry about getting everyone into the chain.
Floor 2[]
- Guest: Syrenne
- Victory: Defeat all enemies.
- Condition (recommended): Syrenne must survive.
- Success text: "You lot are quite good, actually."
- Failure text: "So he managed to get away?"
- Time: Wipe out several enemies quickly, then use short movements to finish off the rest.
If the Floor 1 condition was failed, Syrenne will flee before battle starts, and the Floor 2 condition can't be fulfilled. It is still possible to get Perfect Fate, but the Floor 4 condition will be more strict.
Floor 3[]
- Time: Wipe out several enemies quickly, then use short movements to finish the floor and set up for the next.
No requirements. Clear the floor to advance.
Preparing for the next floor: Set up your units to pincer two of the enemies on the next floor.
Floor 4[]
- Guest: Mirania
- Victory: Defeat all enemies.
- Condition: End the battle within five turns. (If a previous Floor's condition was failed, end it within three turns.)
- Success: "The ship is this way."
- Failure: "Looks like we managed to fend them off."
- Time: Rush.
The Venomous Ghoul enemy will put up a shield every other turn, rendering it nearly impervious to damage. This means there are only three turns where it is vulnerable, or two turns for the harder condition.
Preparing for the next floor: Try to set up for pincering the middle row, or two middle rows if possible. Spawning enemies will push your units to the left, then the top, so put two units near the right edge and two units that can be pushed into the left edge position.
Floor 5[]
No requirements. Clear the floor to advance.
Preparing for the next floor: Put a unit right below the spawn location of the next floor's middle enemy, and have a PP next to it for a vertical pincer on that enemy. This allows Yurick a short path to a vertical pincer, and his Inferno with a Powered Point will guarantee three Yurick kills right away.
Floor 6[]
- Guest: Yurick
- Condition: Kill at least four Golems (ice) with Yurick's magic.
- Yurick's magic must deal the final blow. He has an AoE(self) and a 1% spell which hits random squares. Both of his spells fail to OHKO an enemy by themselves, so you should use PP or lead a pincer with him.
- Success: "Well, we made it...somehow."
- Failure: "They didn't stand a chance!"
- Time: After the initial pincer, feel free to finish the rest off with flicks.
The monsters here (6 in total) are vulnerable to Fire and absorb Ice. Yurick must kill at least 4 enemies. For an easier time, use a Powered Point to activate his Meteor. Any leftover enemies can be killed with his Inferno (area 1).
Chain order matters. If an enemy is at 0HP by the time it is hit by Inferno or Meteor, it doesn't count as Yurick's kill. For best results, use Yurick to lead a pincer from the bottom or left side of an enemy so that his skills activate first. (See this chain order guide.)
The Golems won't move until there is only one left, so it is safe to make fast, weak moves.
Floor 7[]
No requirements. Clear the floor to advance.
Floor 8[]
- Guest: Lowell
- Condition: Don't end the battle before the sixth turn.
- Success:
- (page 13) "If only one of us can live"
- (page 14, center of page) Beside him towers the white sentinel beast Mitra.
- Failure:
- 13, center of page: (missing the Mitra line)
- Time: It is both safe and necessary to take many turns on this floor. Make short, weak moves.
Nullify Healing will be cast on the party at the start of the battle. Though the condition can be fulfilled in six turns, it is recommended that the battle not be completed until the ninth turn, when Nullify Healing runs out.
The Muruks will move and use Breath to knock away units without doing damage. If one is left as the last enemy, it will cast Inferno Breath, All every turn.
The Golems (fire) will not move, and they will alternate between Inferno, Vertical(2) and Inferno, Horizontal(2). If one is the last enemy, it will randomly cast one of its two Inferno spells, and then try to move between your units for the next cast.
Ideally, leave two Golems alive, so that they won't move, and can be pincered and killed when ready. Be sure to set up for the next floor in those nine turns. If you need help with the initial placement of enemy units in all floors, see here. (Courtesy of Brakkis at Terra Battle Club.)
This floor does not require big movements, and very little movement time should be spent after the initial pincer. Lowell casts a Fire shield on the units around him which will help keep them alive without healing, and his ice damage can be enough to kill Golems.
Preparing for the next floor: Have units near the top-right corner, so they are ready to take down Mitra. You may want to keep bows away from the very top row, as they will be hurt by Zael's first Sword attack.
Floor 9[]
- Condition: Kill Mitra. Zael (Enemy) must survive).
- Success: (only four lines on first page)
- Failure: "It can't be... Calista? Agh..."
- Failure on an earlier floor: "Dammit, he's not breathing!"
- Time: Finish it quickly. Mitra and Zael are both strong, and the minions can overwhelm you.
If you do floor 4, 6, and 8 right, Mitra will appear. Kill Mitra to advance to the next floor but Zael must not be killed.
There are two main strategies to quickly kill this floor.
- Kill the sparks first, as they will continue to spawn as long as one is left.
- Surround Mitra, keep it locked in place, and defeat it in a few turns.
In either case, setting up should be done on the previous floor, where it is safe to make small, quick movements to get into the desired positions.
To remove Mitra's damage mitigation barrier, hit it with 9 instances of magical damage (including leeching attacks). If, for example, Pizfer unleashes 5 different magic skills in one pincer, you only have to do 4 more instances to nullify Mitra's barrier, not 8 more. If Mitra doesn't levitate anymore, it means the barrier has been removed.
Floor 10[]
- Guest: Zael
- Condition: Have Zael hit Calista on the final turn.
- Success (Perfect/Alternate Fate): (center of page 1) "Is that...Ancient Barrier?"
- If the movement time condition was fulfilled, there will be two paragraphs on the second page. If it was not, there will be three paragraphs.
- Failure (Contrary/Blind Fate): (center of page 1) "Fresh blood gushes from Zael's body." (Blind Fate or Contrary Fate)
Kill the boss to win the battle. You need to use Zael as pincer lead when last hitting the boss, so keep him alive. The minions in this floor buffs the boss' DEF and MDEF by a large amount(150% of DEF and MDEF each) when adjacent to the boss (it also buff other minions that are adjacent to it, which is why the minions on the boss' corners are more tanky). The minions can also call for minion reinforcements when some minions are killed so you may need to kill as many minions as you can at once to reduce the boss' defenses. However, new minion reinforcements will not move immediately, so there is a slight delay until the boss' defenses are buffed again. When the boss is at low health (about 30% or less), it will call up to 6 more minion reinforcements, but as written earlier they will not move immediately and won't buff the boss' defenses if they are not positioned adjacent to the boss, so at that point it might be better to ignore them and just kill the boss fast.
Enjoy the ending. If you do the above correctly, you should get both Zael and Calista (Perfect Fate). If you get Calista but not Zael (Alternate Fate), it means you take longer than 50 seconds of drag time in total. If you get nothing, it means you didn't fulfill some of the requirements above (Contrary Fate if Mitra did not appear on floor 9; Blind Fate if you killed Zael on floor 9 or Zael did not hit Calista on the last turn).
Notes[]
- There is no level cap for this event, so if you're having a hard time, level up your squad for an easier time.
- High physical damage dealers are preferred. Mages don't hit as hard as usual here except in battles 6 and 8. Sword wielders are preferable as all of the monsters in this dungeon use either bow or staff (except when encountering a boss in battle 9, he uses sword); but keep non-physical damage source for floor 9.
- Zael and Calista may still be recruited even if energy is used to revive the party. (contributed by Vitiosa. See comments below for more details)
- Recruiting Zael or Calista again will give the respective character +3% skill boost.
Visionary Fate[]
The requirements for Visionary Fate is the same as Perfect Fate except for battles 9 and 10, and that recruited Zael and Calista in their job 3 are in your party. In battle 9A, Zael must be killed instead of Mitra, which will lead to battle 10B. In battle 10B, Zael and Calista, both at their job 3, must lead the final pincer to kill the boss Sentinel Beast Calista within 8 turns. If this last pincer is a horizontal pincer, Zael must be on the left and Calista on the right. If it's a vertical pincer, Zael must be on the bottom and Calista on top.
Note that the final pincer must be done using the recruitable character Zael, not the NPC ally Zael. If the boss is killed by a (magic) bomb after the final pincer, it will not result in Visionary Fate.
Unlike Perfect Fate, there is no drag time requirement.
Trivia[]
- The event originally lasted from April 23 to May 31, 2015, but it was extended on May 22 to last until June 30, 2015.
- The event was re-released on December 24, 2015 and lasted until January 31, 2016 at 00:00 UTC.
- This added an additional ending and the Celestial Envoy companion to the quest.
See also[]
Gallery[]
")
")
")
")
")
")
")
")
")
")
")
")
")
")
")
")
")
| The Last Story | |
|---|---|
| Characters | |
| Companions | |
| Allies | Lowell • Mirania • Syrenne • Yurick • Zael |
| Enemies | Energy Spark • Golem • Gryphon • Gurak Grunt • Hermit Crab • Muruk • Ogre • Shadow Lion • Shadow Panther • Snowy Owl • Venomous Ghoul |
| Bosses | Calista • Mitra • Sentinel Beast Calista • Zael |